
Create an Assessment
Set up an assessment, organize its sections, configure candidate settings, and submit it for use.
Open Assessments to start creating
From the RedyHire admin workspace, select Assessments in the left navigation, then select Create Assessment.
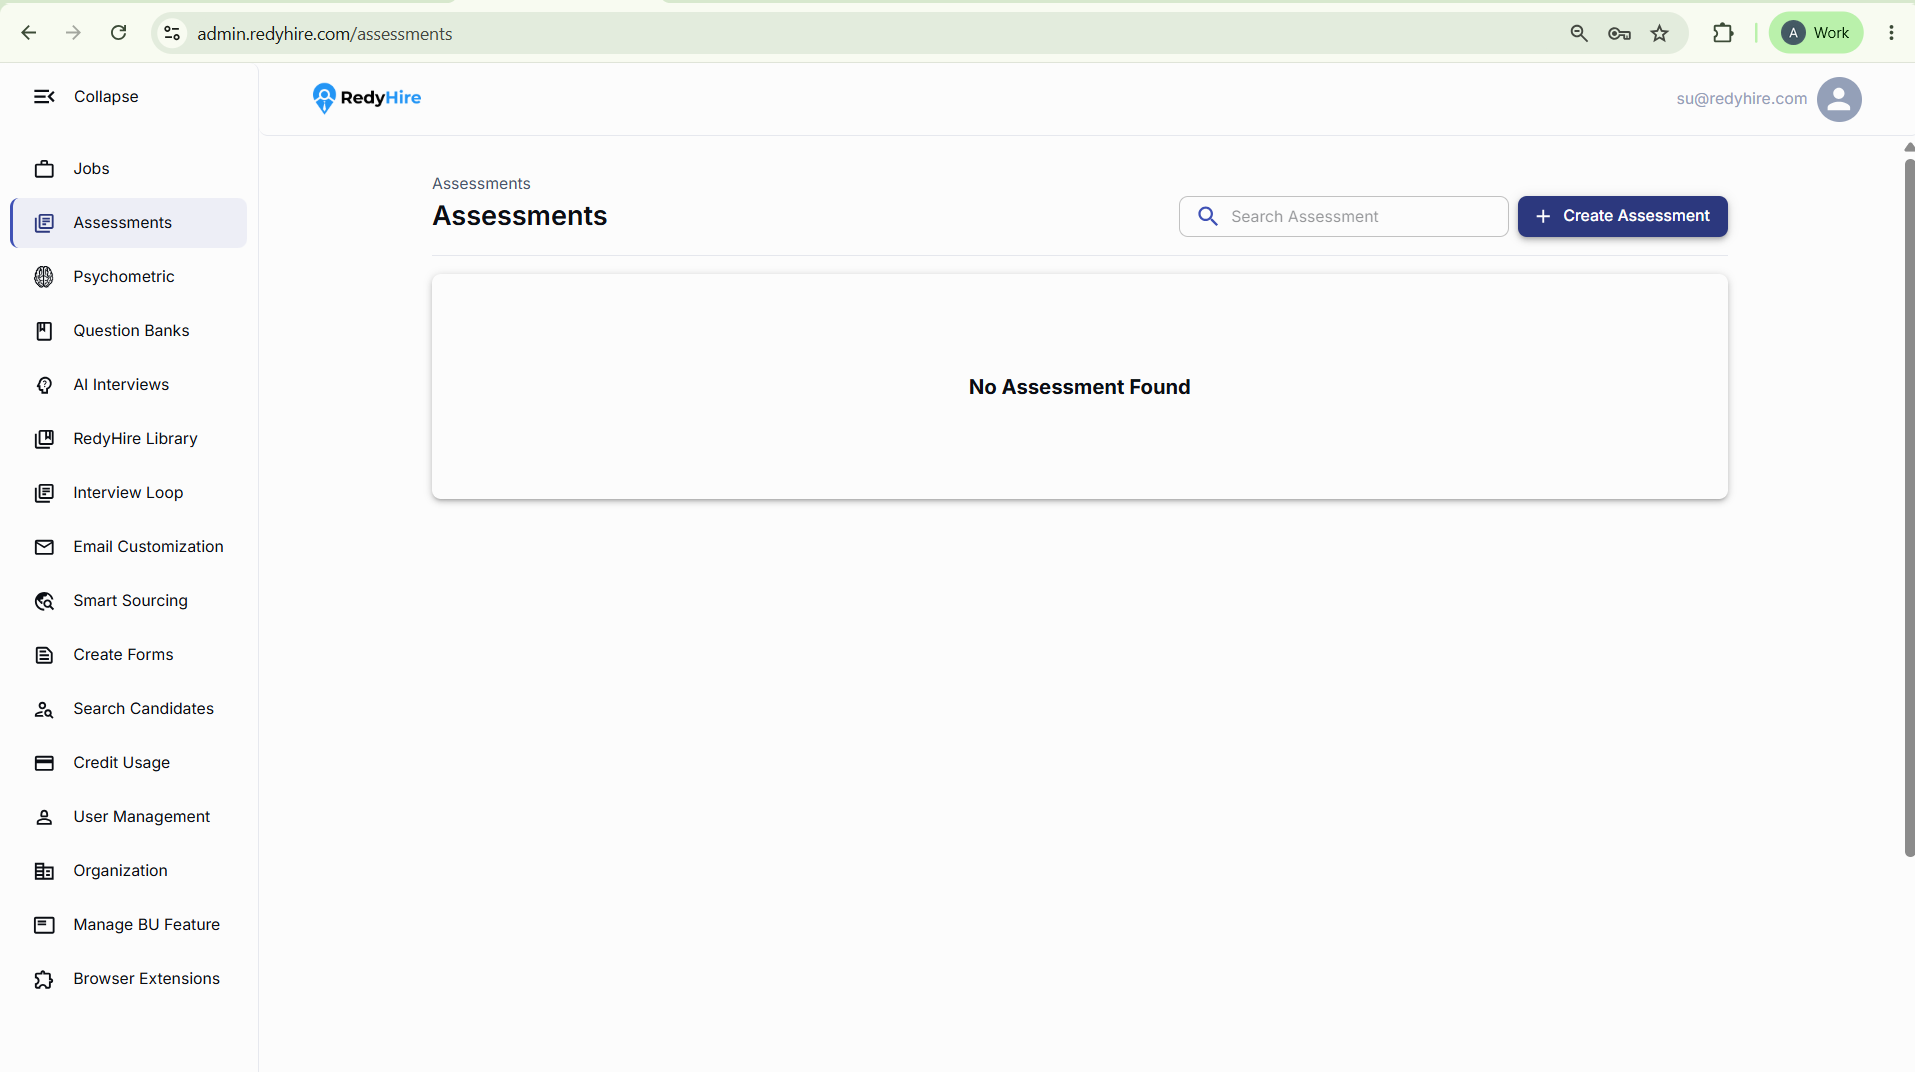
Select Assessments from the left navigation.
Select Create Assessment to begin.
Add the assessment details
Add the assessment name and an internal description of the skills or topics it evaluates.
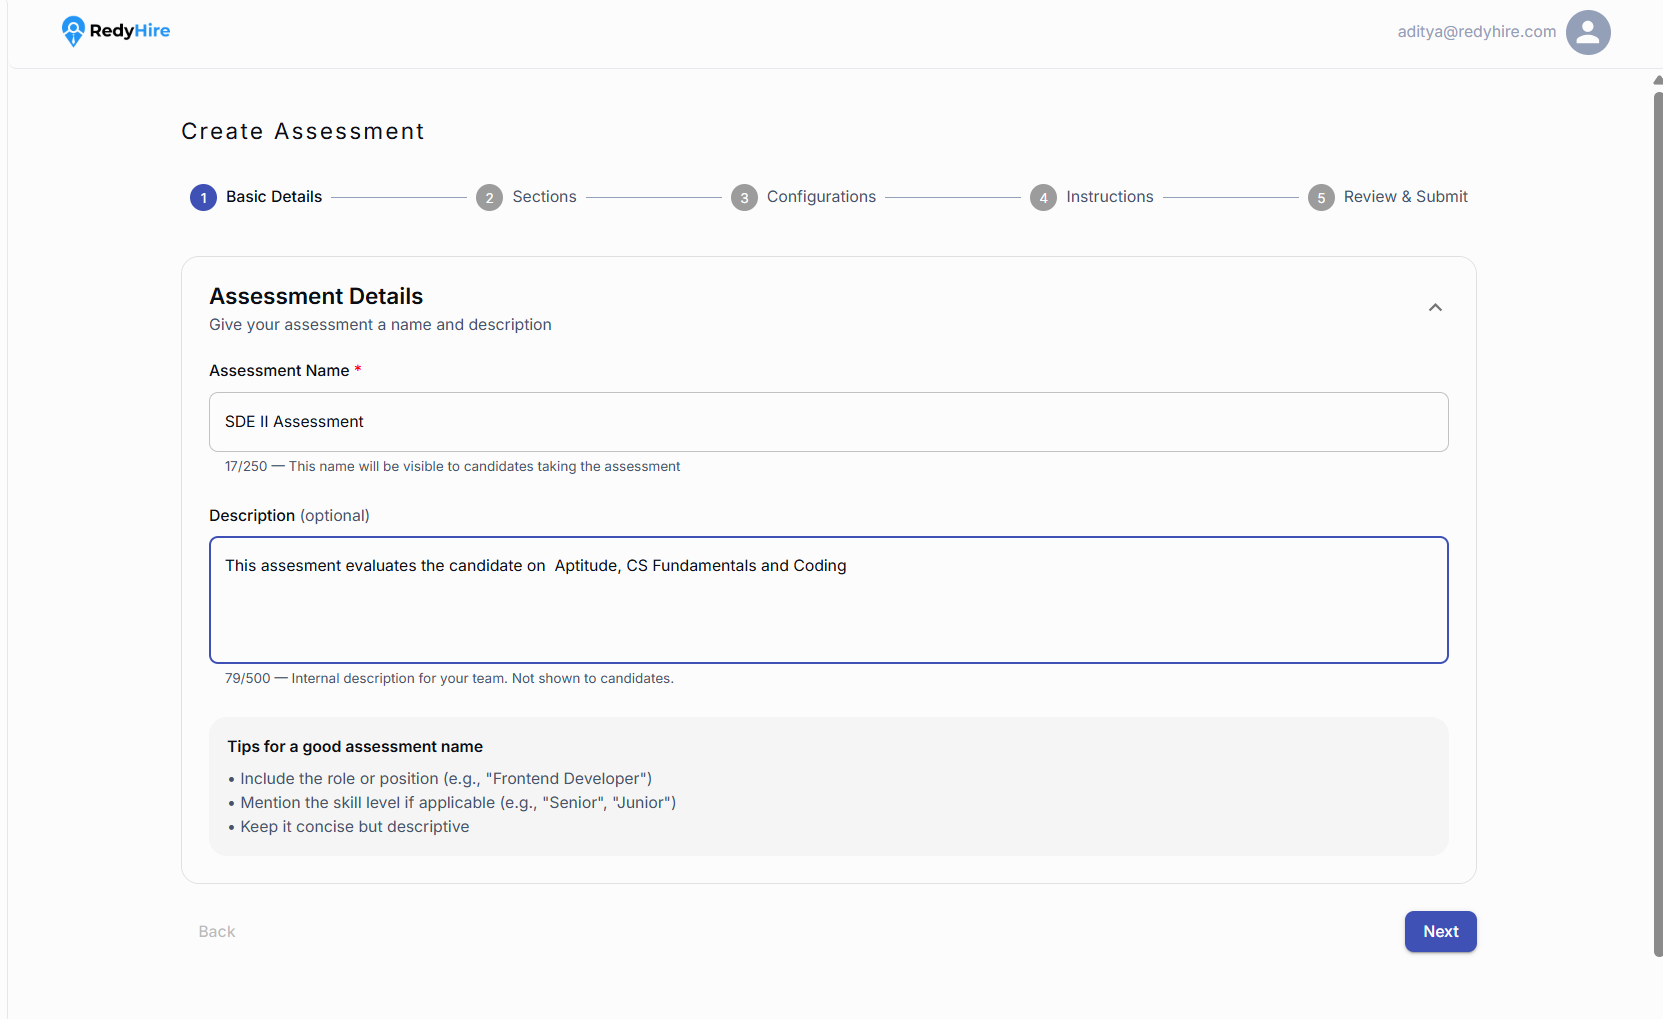
Use a name that identifies the role or hiring stage.
Describe the skills or topics being evaluated.
Add an assessment section
Use sections to group questions by skill, topic, or evaluation stage. Select Add Section to create one.
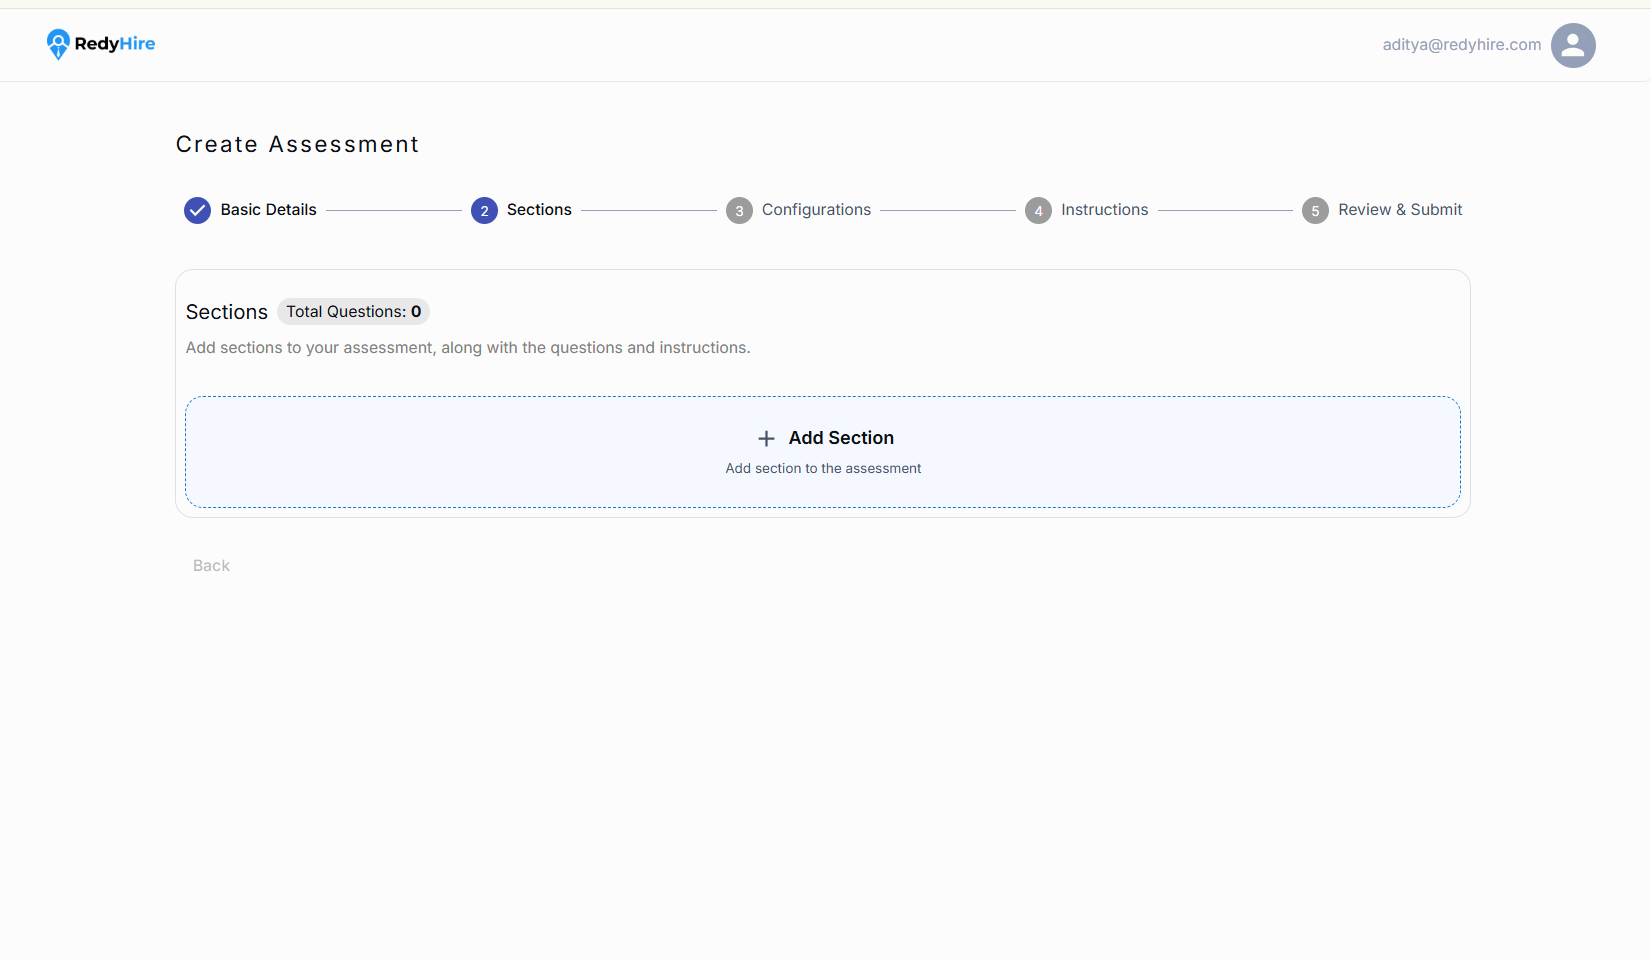
Select Add Section to begin building the assessment.
Define the section
Give the section a clear name that reflects the skill or topic it evaluates, such as Aptitude, Coding, or Communication.
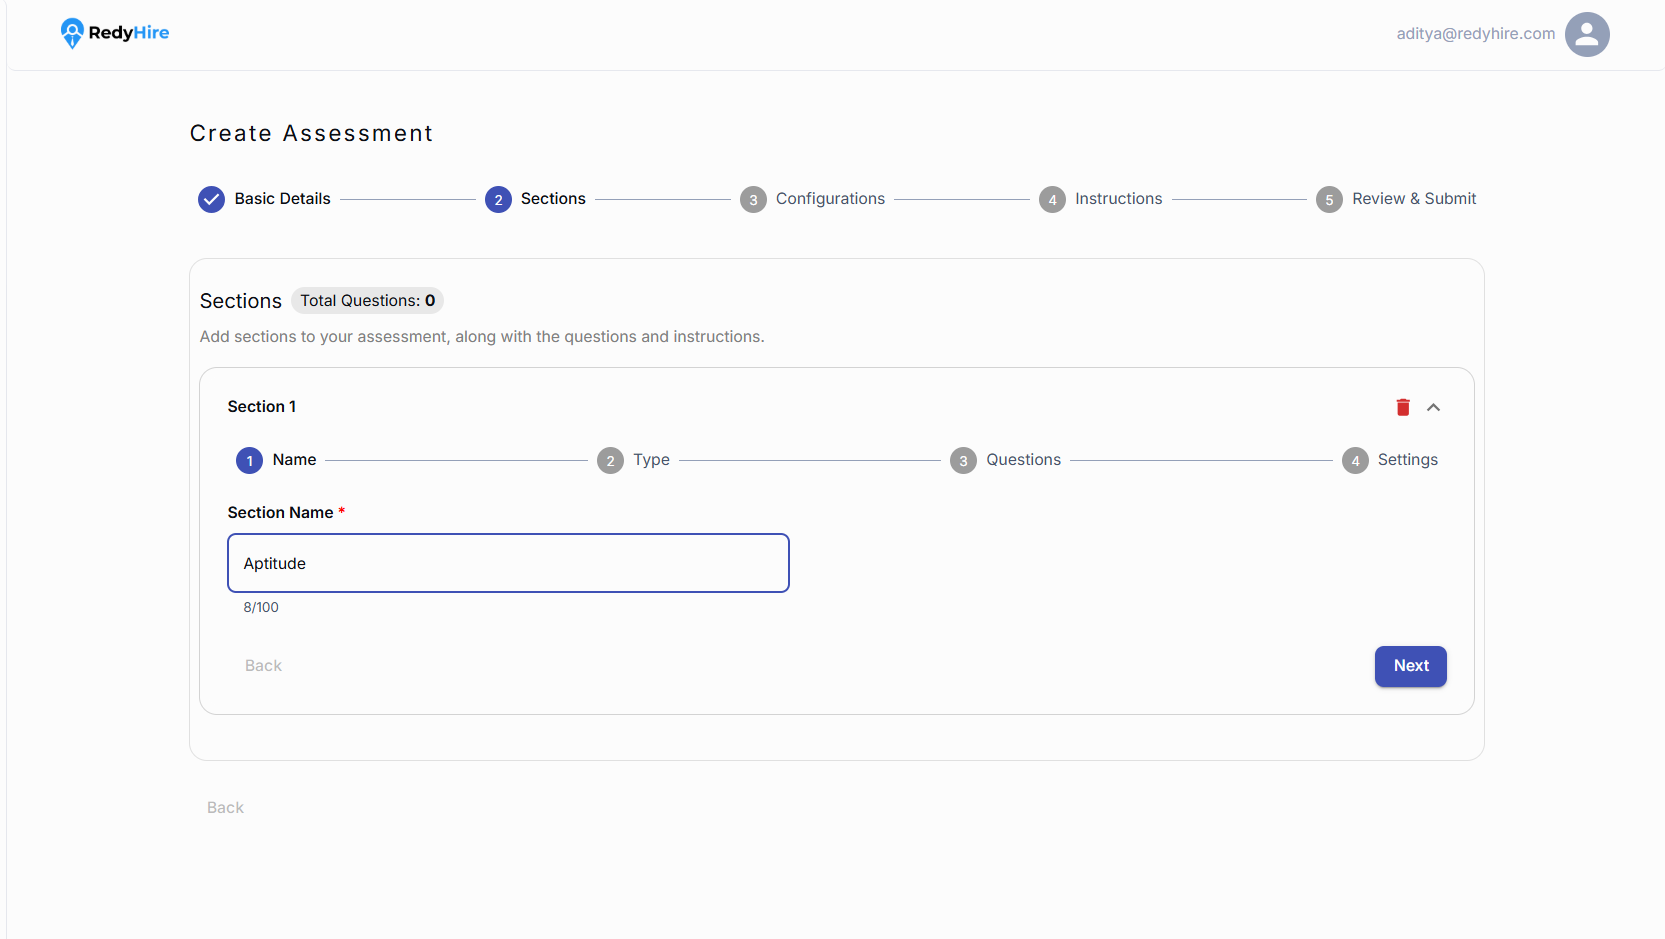
Enter a name that clearly describes what this section measures.
Select Next to choose how questions will be added.
Choose how to add questions
Choose Criteria Based to let RedyHire select matching questions automatically, or Fixed Questions to select specific questions yourself.
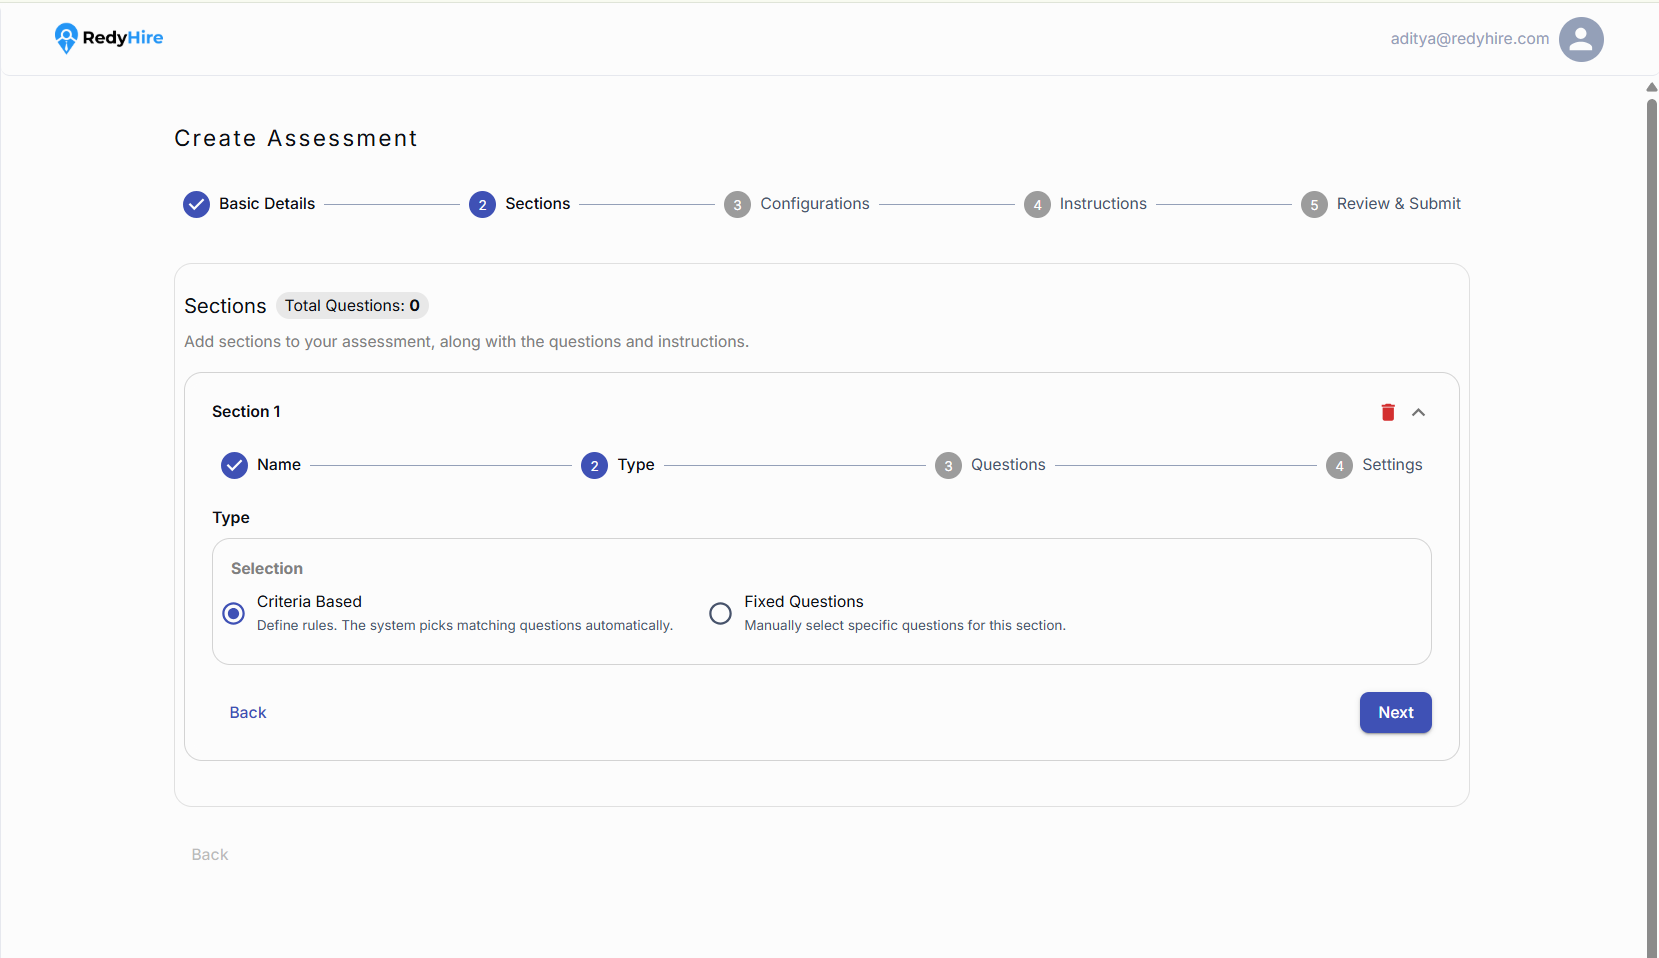
Choose Criteria Based to build the question set using rules.
Choose Fixed Questions when you want to select the exact questions.
Add question criteria
Select Add Criteria to choose the source, filters, and difficulty levels.
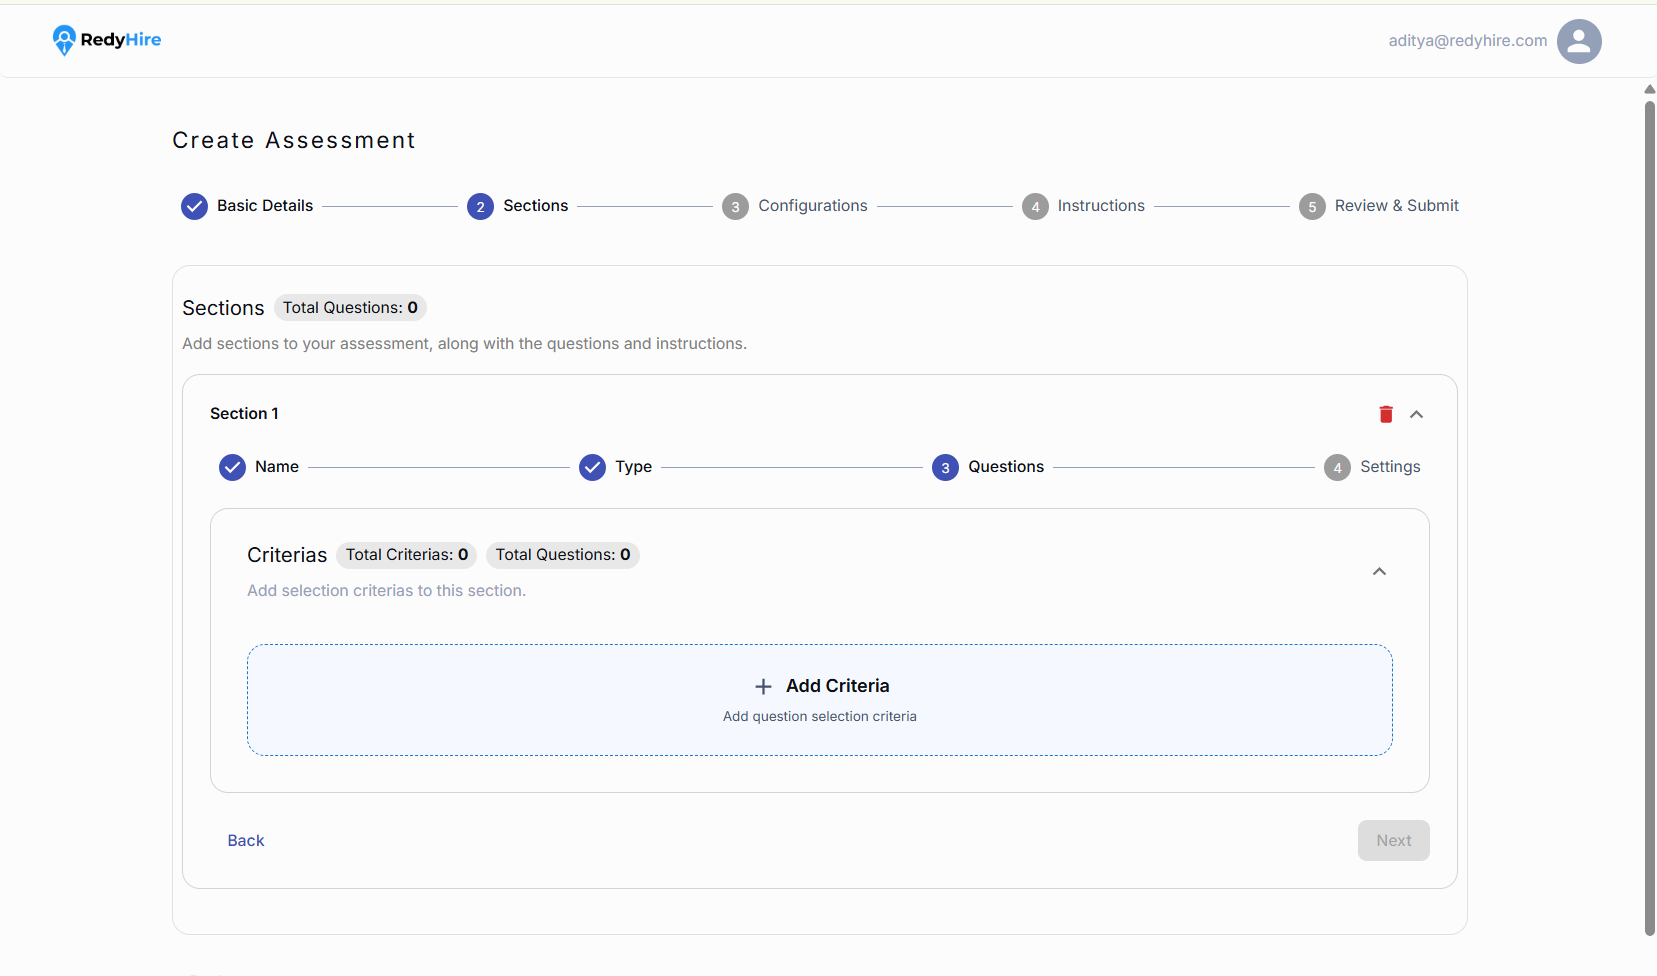
Select Add Criteria.
Choose a question source
Choose a question bank or RedyHire library.
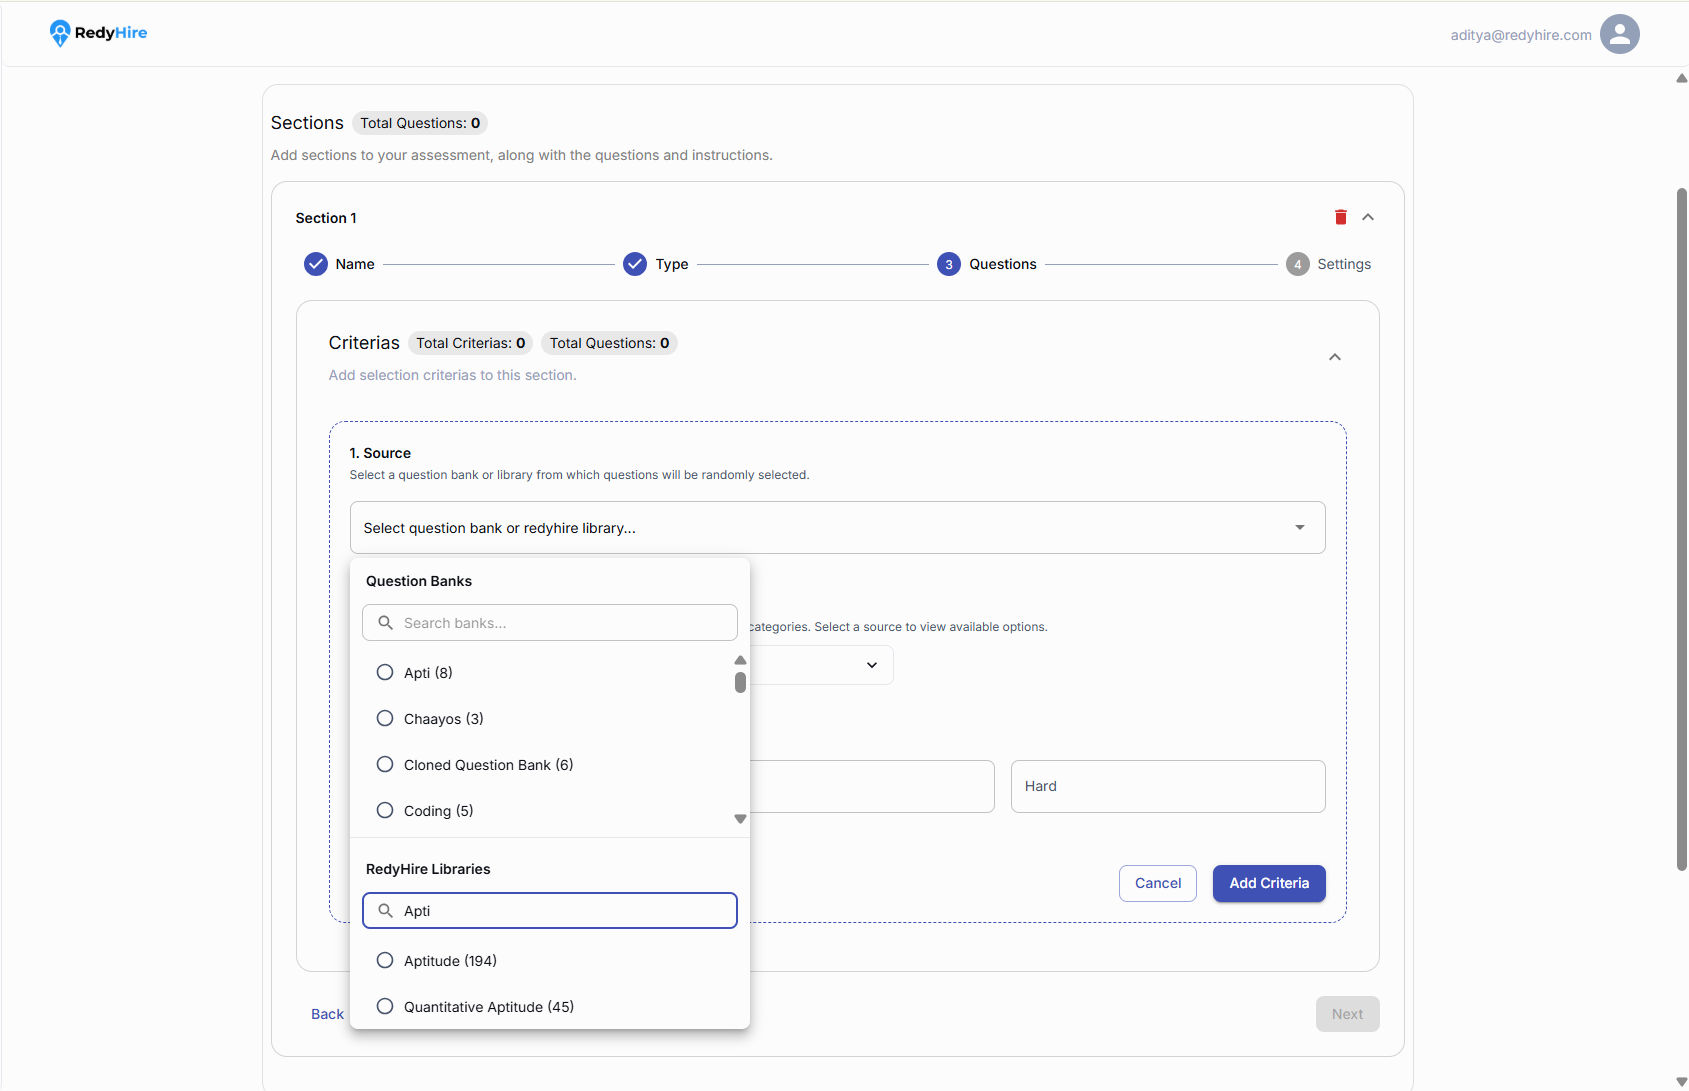
Search for and select a question source.
Your selection determines the available questions.
Set filters and difficulty levels
Set filters and choose the number of easy, medium, and hard questions.
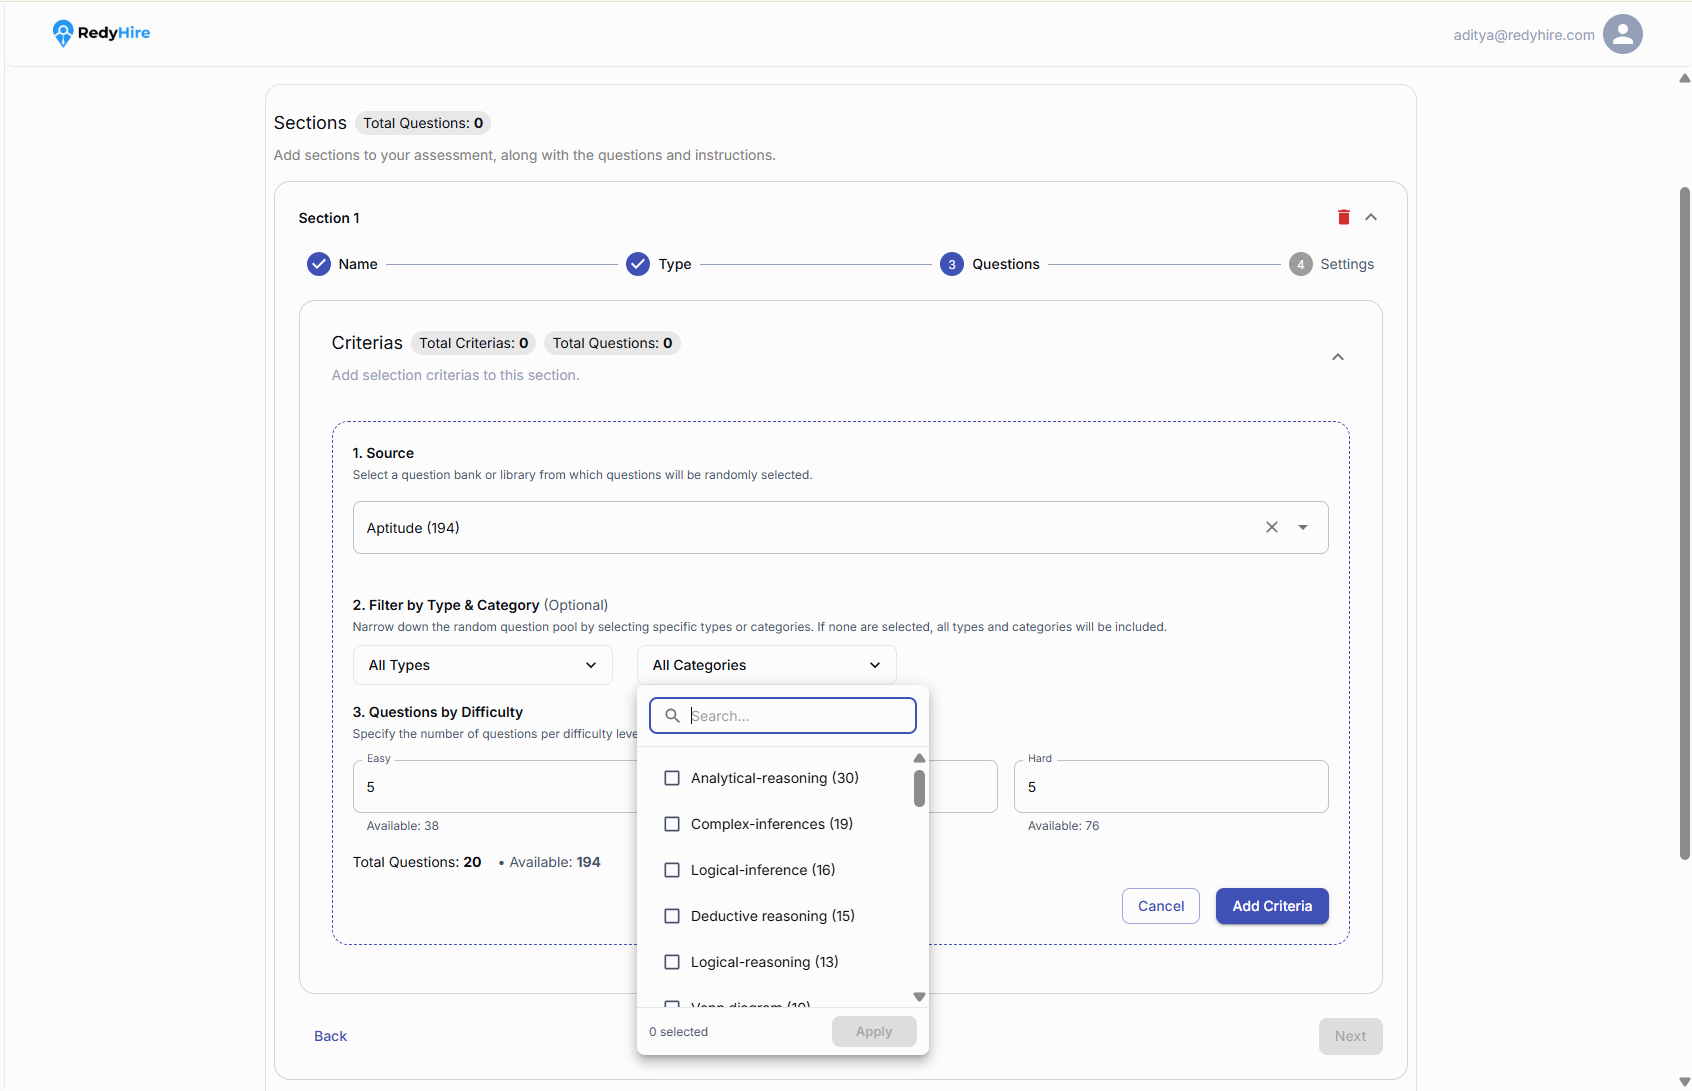
Set the question type and category filters.
Set the number of questions for each difficulty level.
Review the section
Check the question count, difficulty levels, source, and filters before continuing.
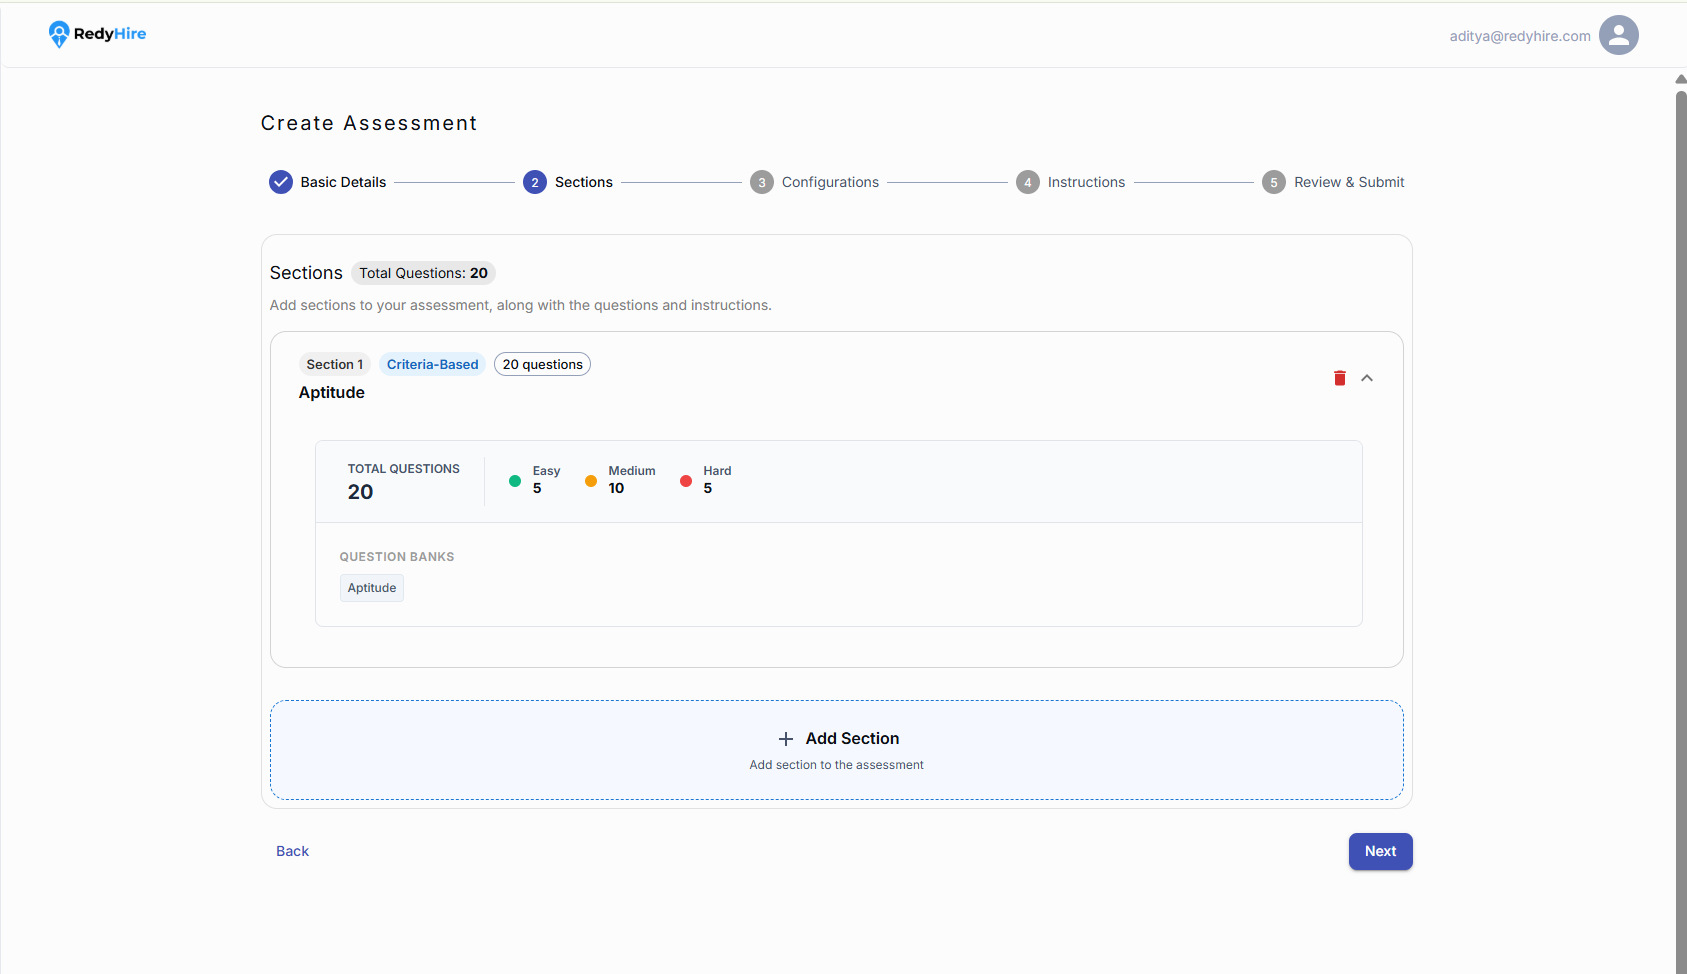
Check the question count and difficulty levels.
Select Add Section to add another skill area.
Add another section
Add another skill area, such as Coding, and choose how to add its questions.
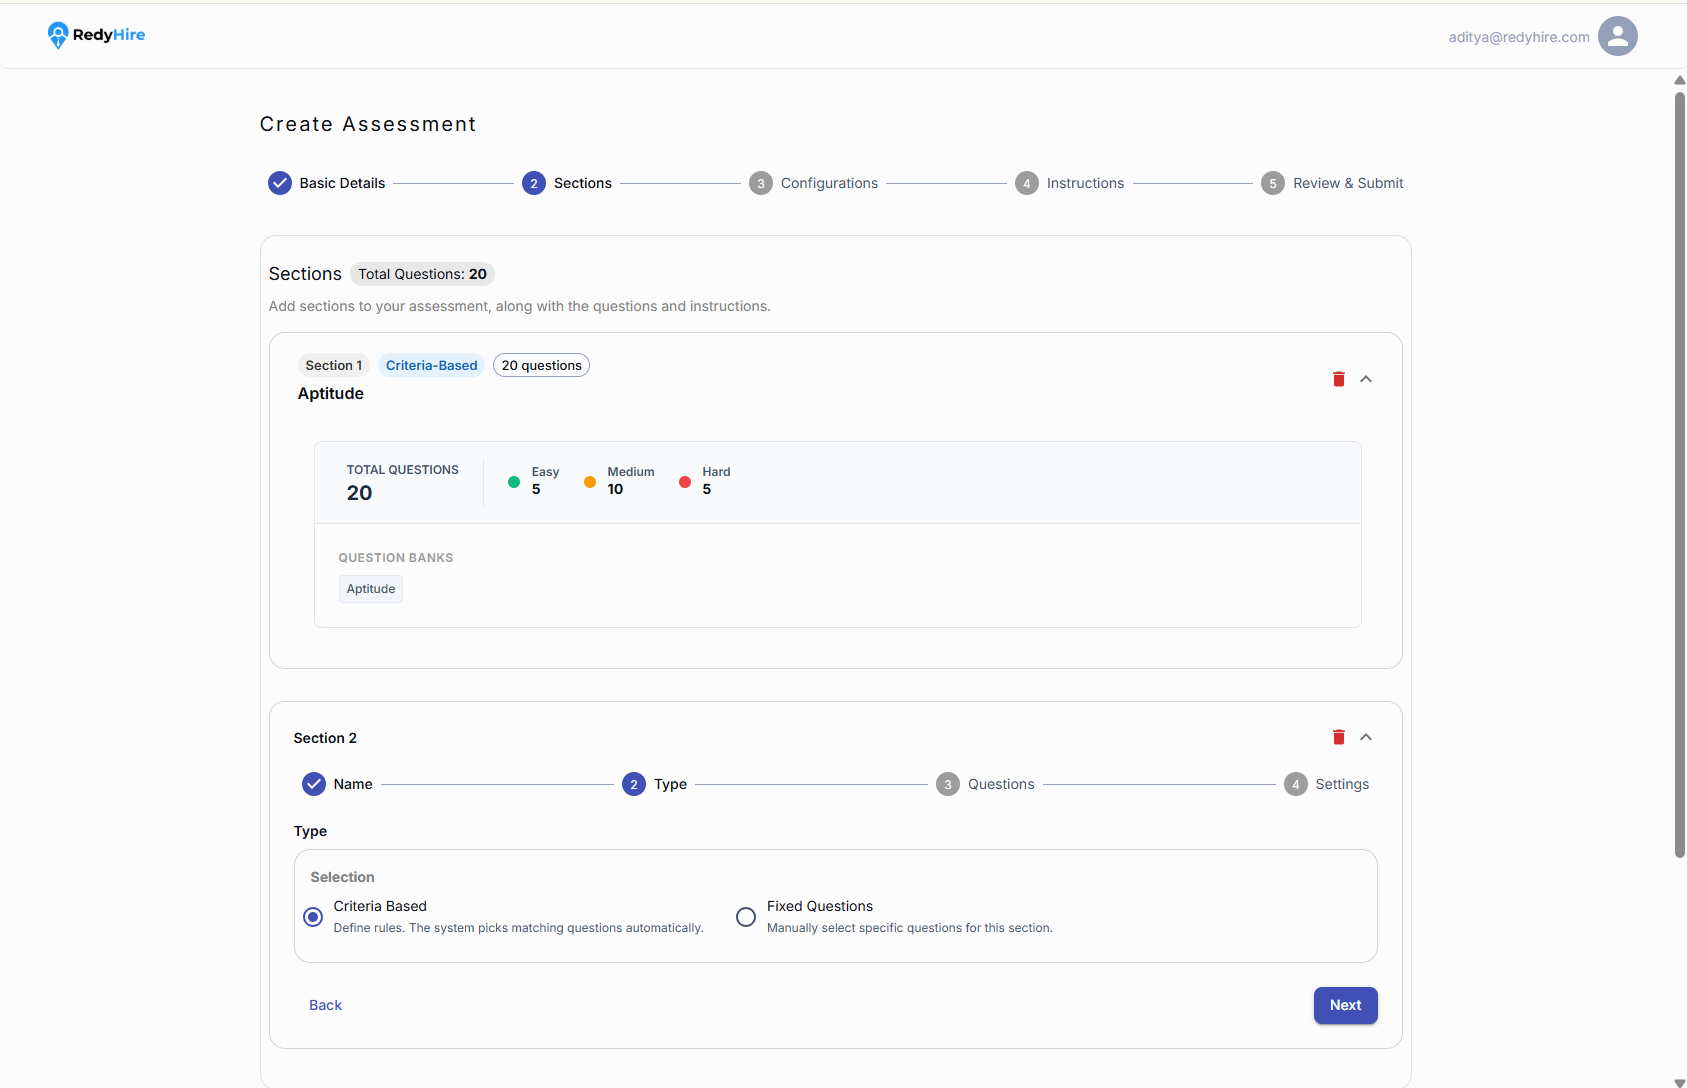
Review the completed section before continuing.
Add the section details and choose Criteria Based or Fixed Questions.
Set coding question criteria
Choose the coding question bank, categories, programming languages, and difficulty levels.
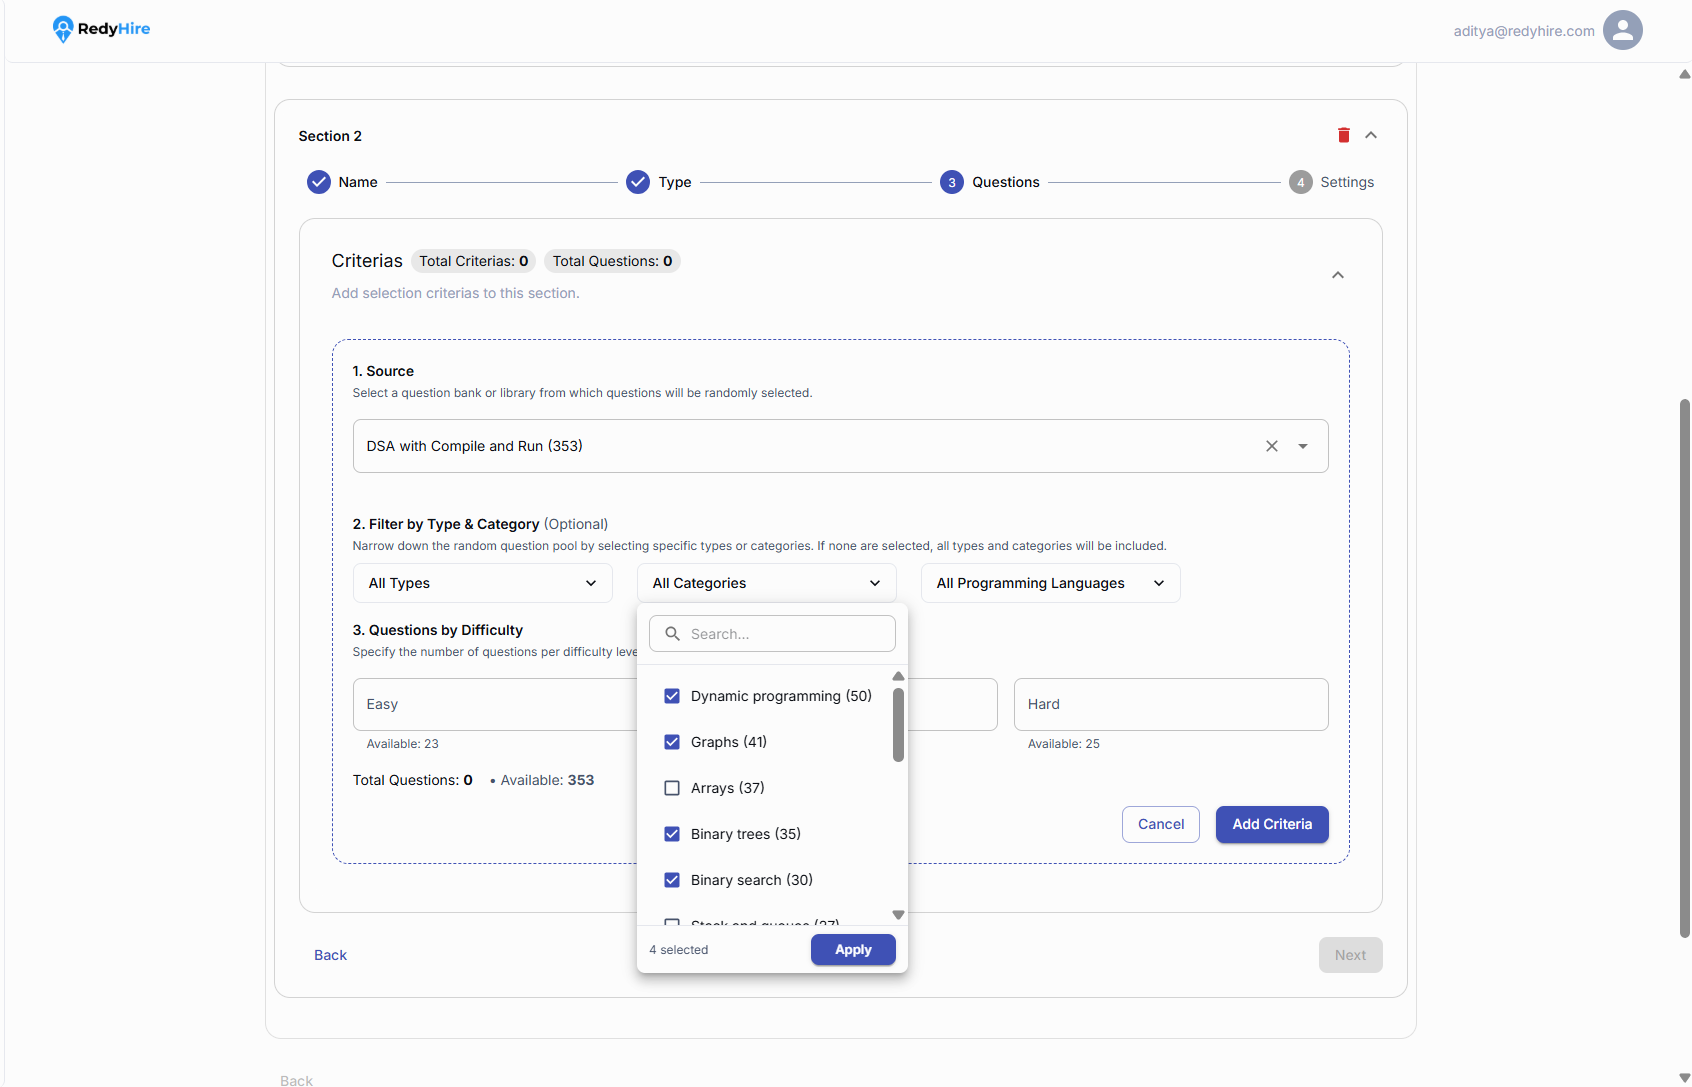
Select the coding question bank and categories.
Set the programming language and difficulty levels.
Review all sections before continuing
Check the overall question count and confirm that each section has the right source, filters, language, and difficulty distribution.
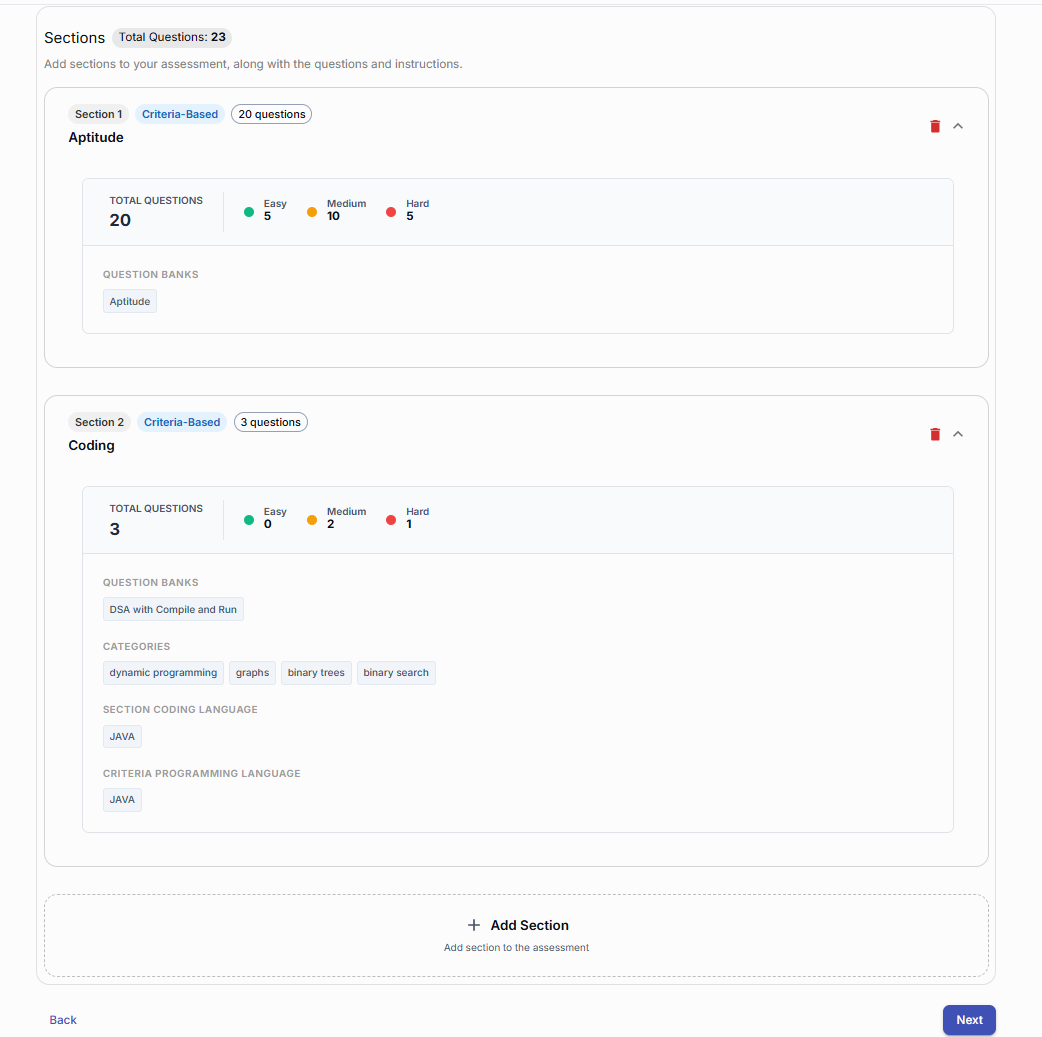
Review every section’s question count and difficulty mix.
Confirm coding categories and language settings before selecting Next.
Configure navigation, proctoring, mobile access, and duration
Choose how candidates move through the assessment, which proctoring controls are enabled, whether mobile is allowed, and how the test duration is calculated.
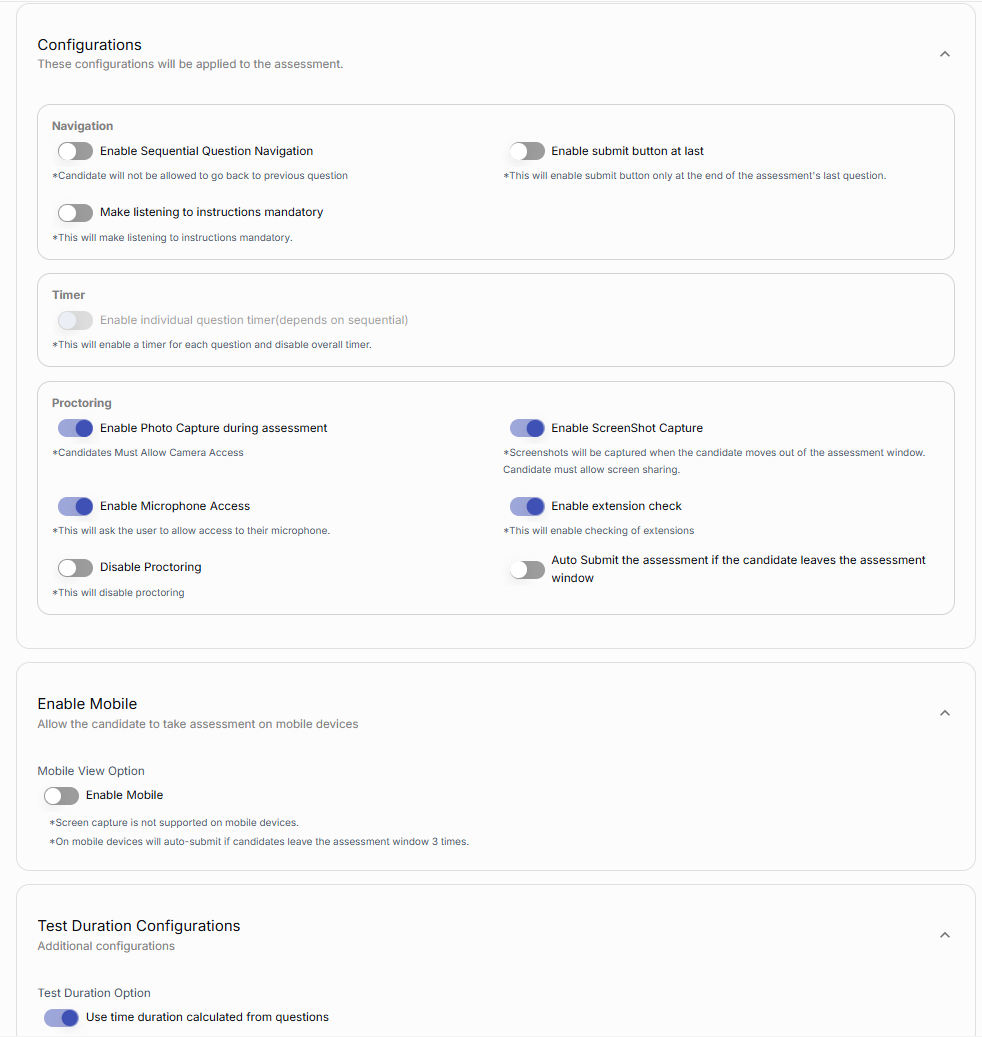
Set navigation and timer behavior for the candidate experience.
Review proctoring, mobile access, and test duration settings carefully.
Add instructions candidates will see before the test
Review the default instructions, then add any role-specific rules or expectations candidates must understand before starting.
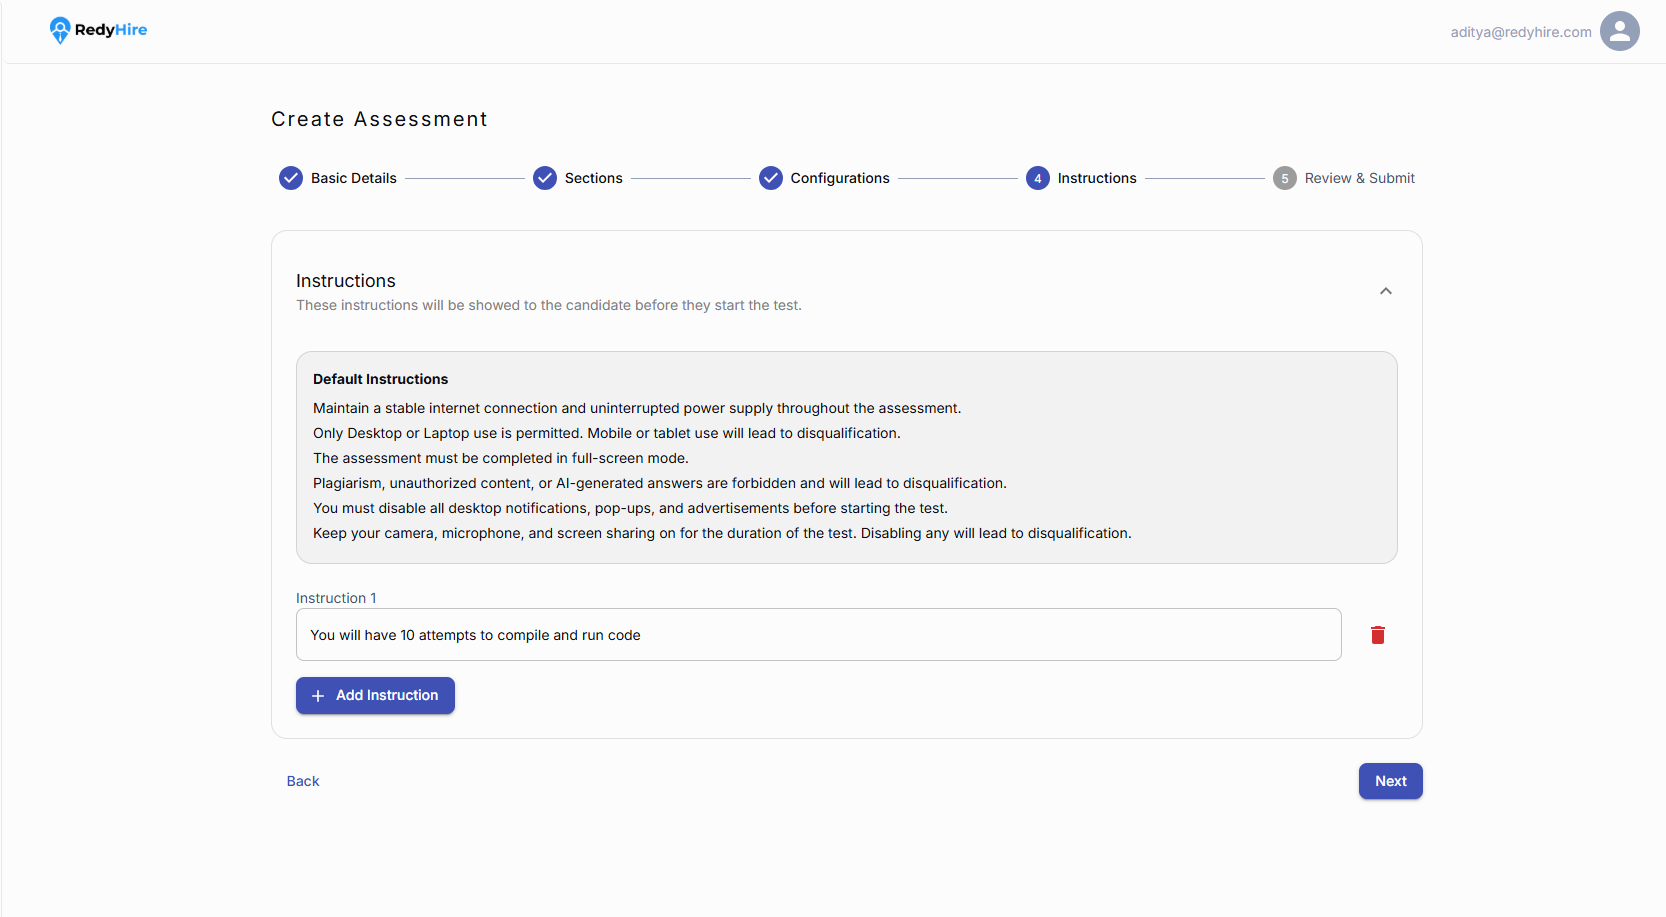
Review the default instructions that will be shown to candidates.
Add custom instructions.
Review and submit the assessment
Review the assessment details, sections, settings, and instructions. When everything is correct, select Create Assessment.
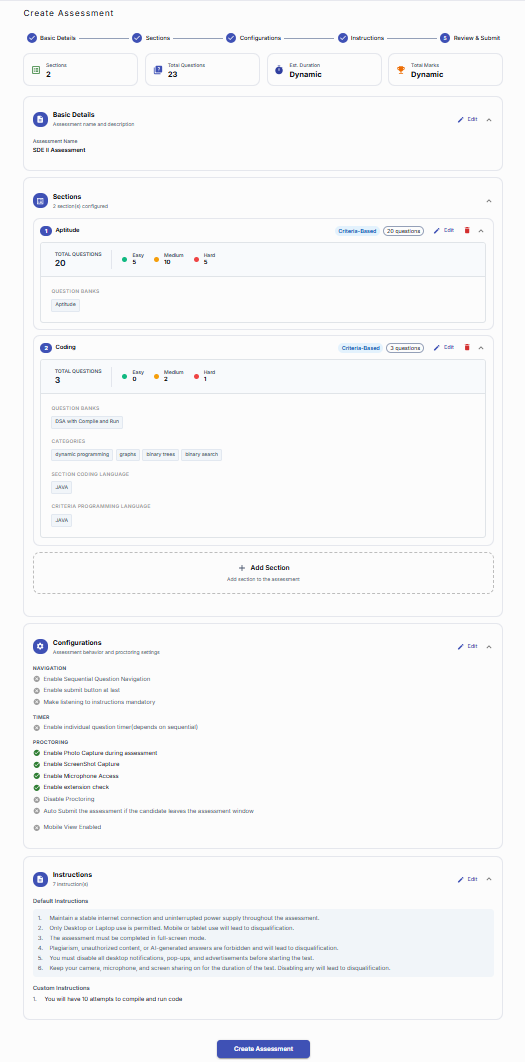
Review the summary cards to verify the assessment.
Select Create Assessment when everything is ready.
Quick checklist before you begin
Use section names that clearly describe the skills or topics being evaluated.
Check that each question source has enough questions for the selected mix.
Review proctoring and navigation settings for the candidate experience.
Use custom instructions to explain rules, coding limits, or expectations.
Keep exploring
These pages explain the assessment product and trust model behind the candidate flow you just reviewed.
Learn about skill assessments
See how RedyHire supports structured evaluation across technical and non-technical skills.
Learn about assessment integrity
Learn about the trust and proctoring features available for candidate assessments.
Explore Product FAQs for assessments
Find buyer and operational answers about assessments, evaluation, question banks, and psychometric workflows.
Contact RedyHire support
If something does not work during setup or while taking the test, contact support right away.